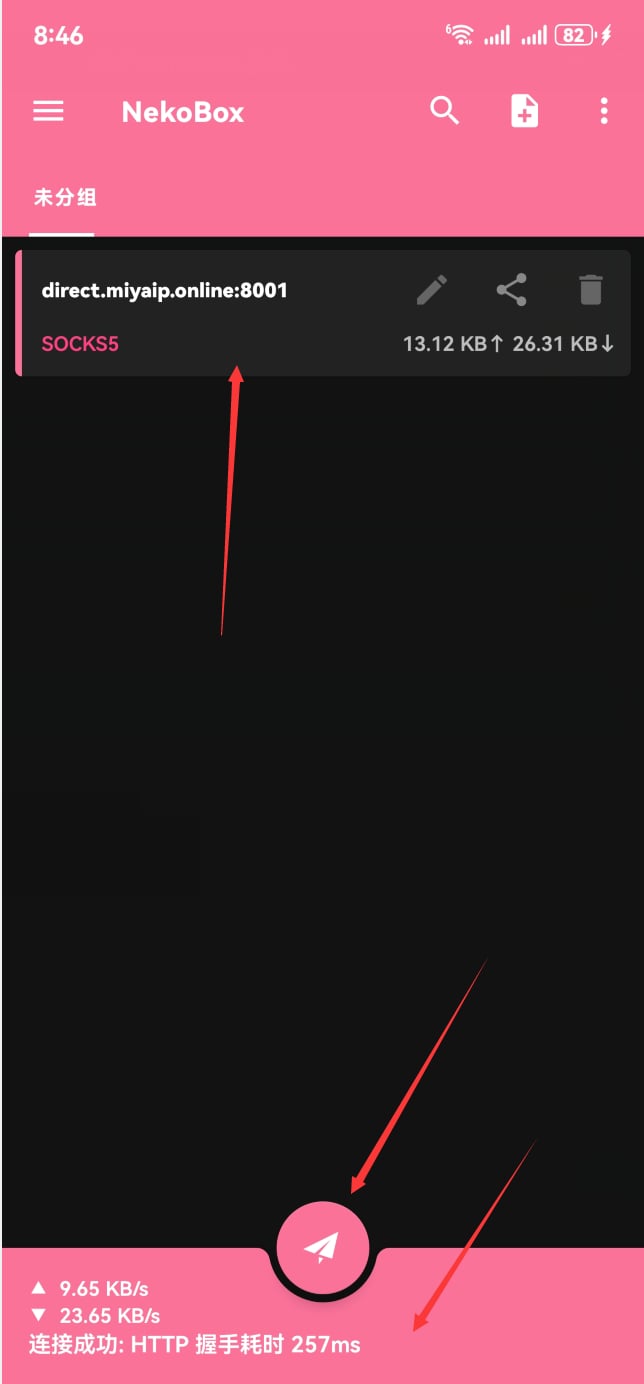
Prepare your Android phone
1
Set the date, time, language, and region
Find General and set your phone’s date and time to those of your target country or region. Choose a language other than Simplified Chinese, preferably your target country’s language, and set the region to your target country or region.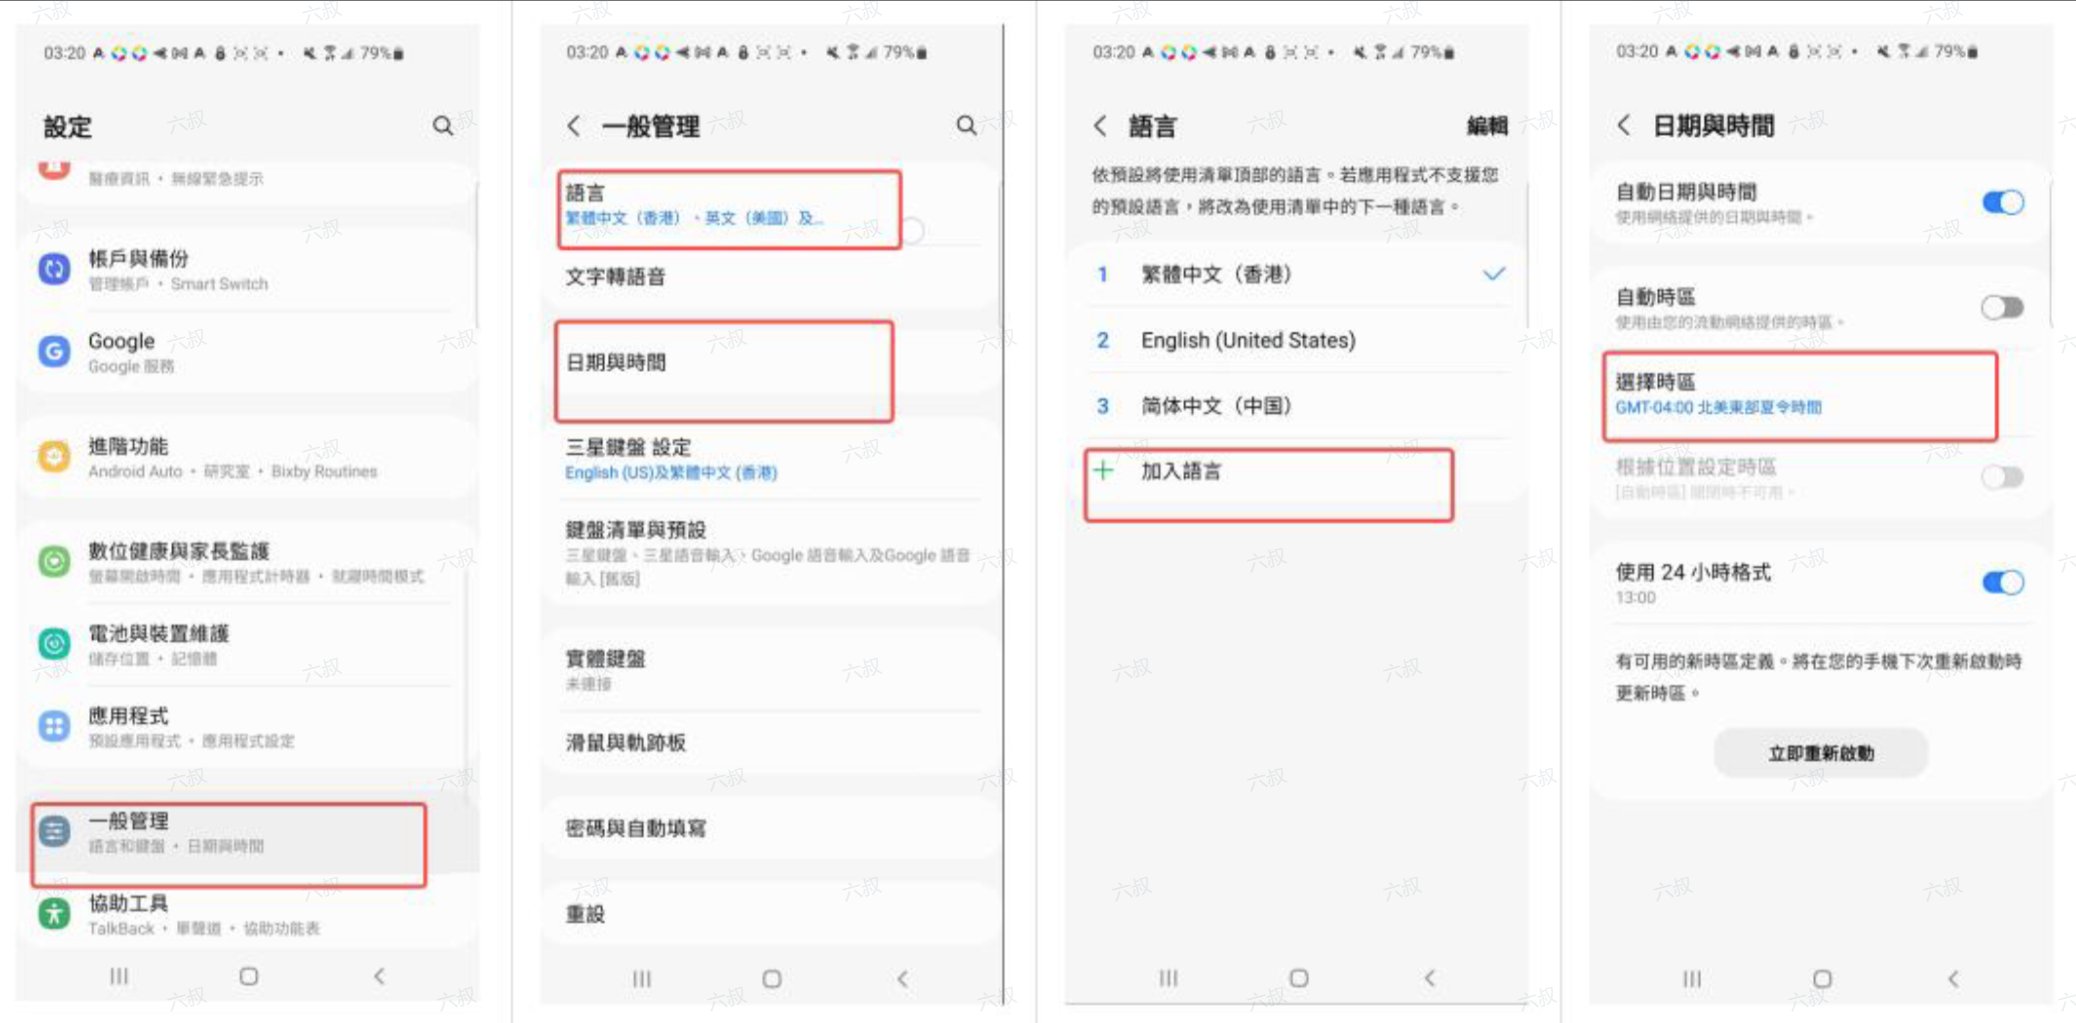
2
Turn off location
Find Location and turn it off to prevent apps from reading your location.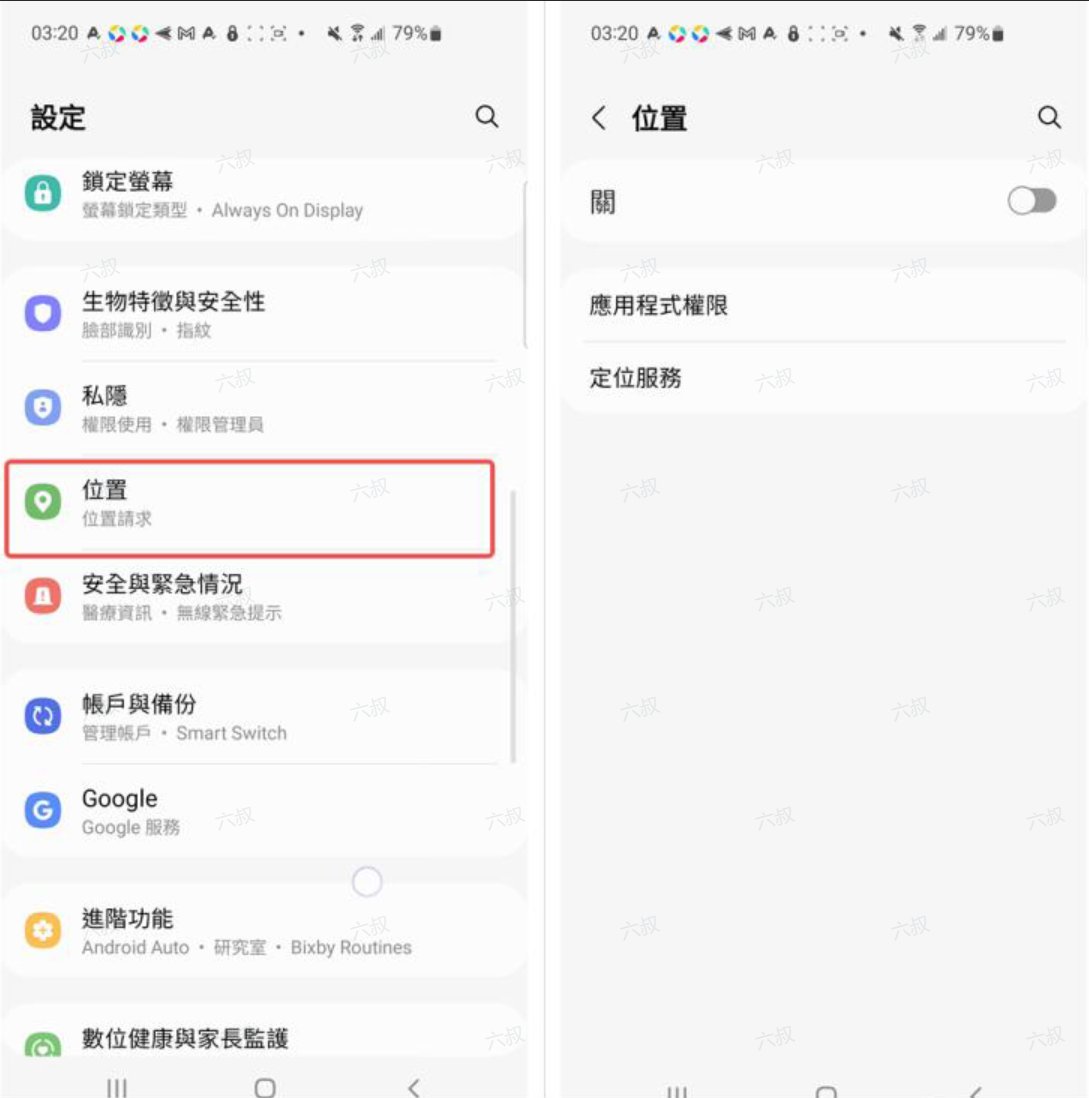
Connect your relay proxy
1
Open the add menu
Open the NekoBox home screen and tap the plus button in the top-right corner.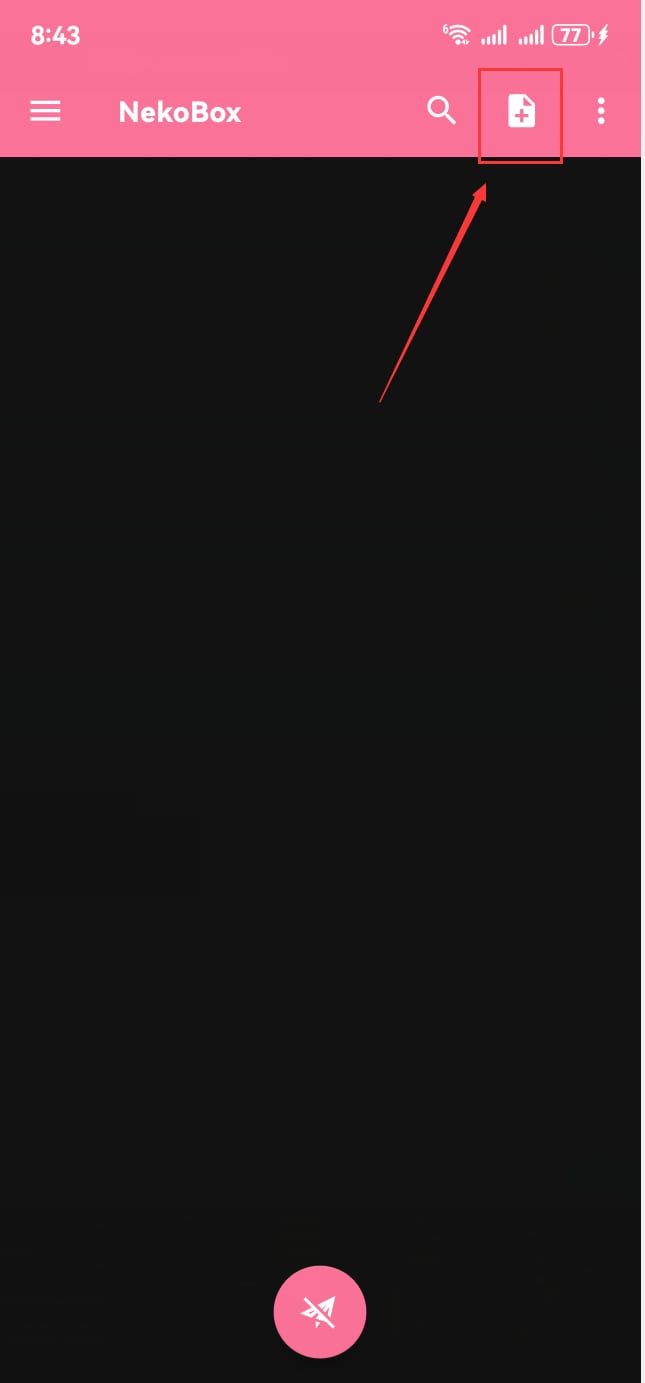
2
Select the QR scanner
Select Scan QR code from the add menu.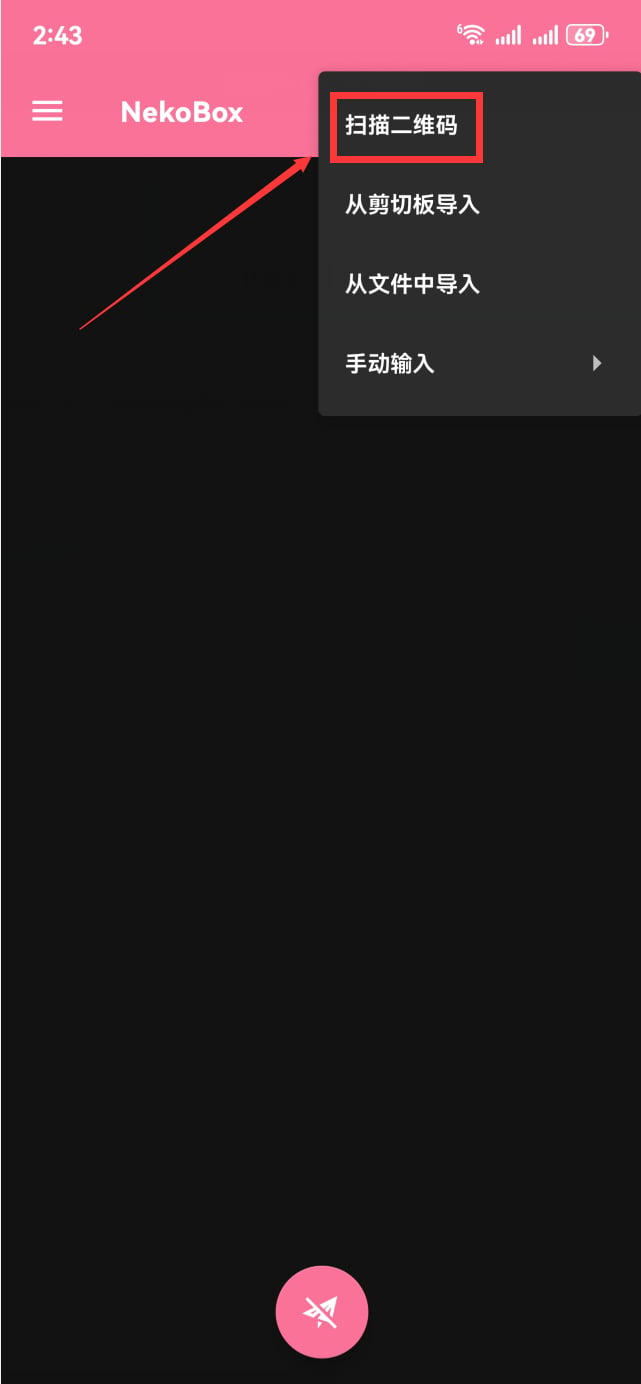
3
Scan and import the NekoBox QR code
On the MiyaIP website, open the relay proxy QR code for your purchased IP, select NekoBox, and scan its QR code to save the node.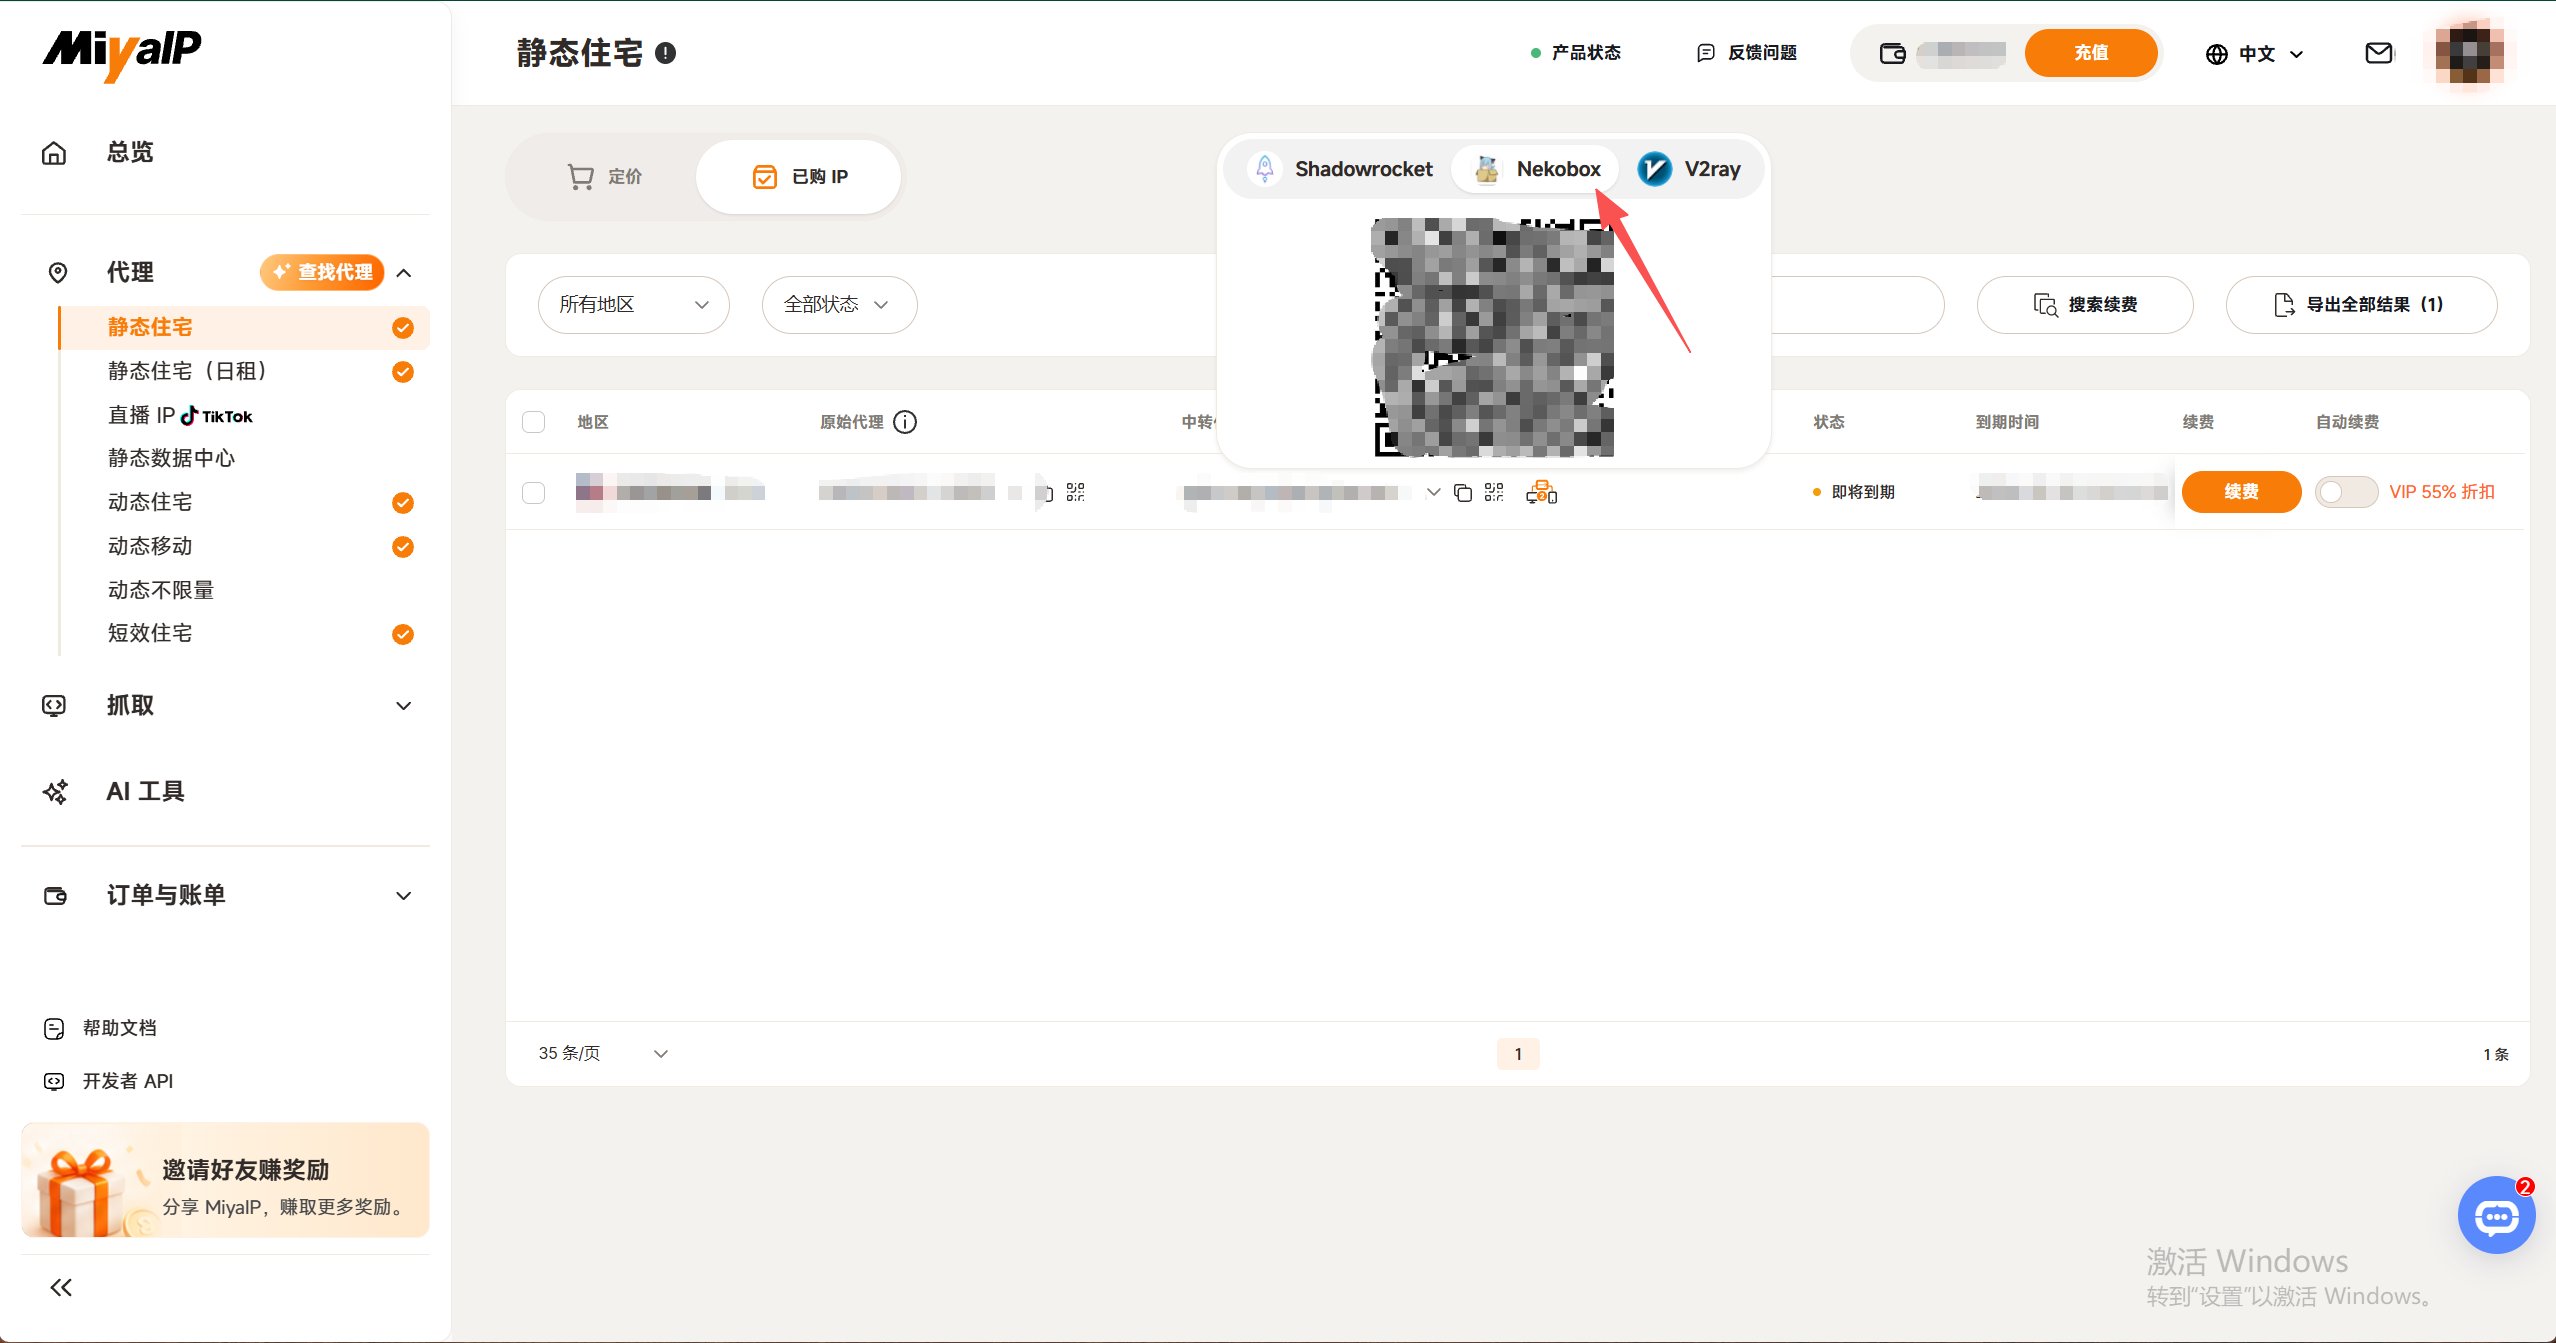
4
Connect and test latency
Select the static node you just saved and tap the paper plane button at the bottom to connect. Tap the pink area to test handshake latency. If the test fails or times out, turn off the paper plane button and reconnect.