

Prepare your device
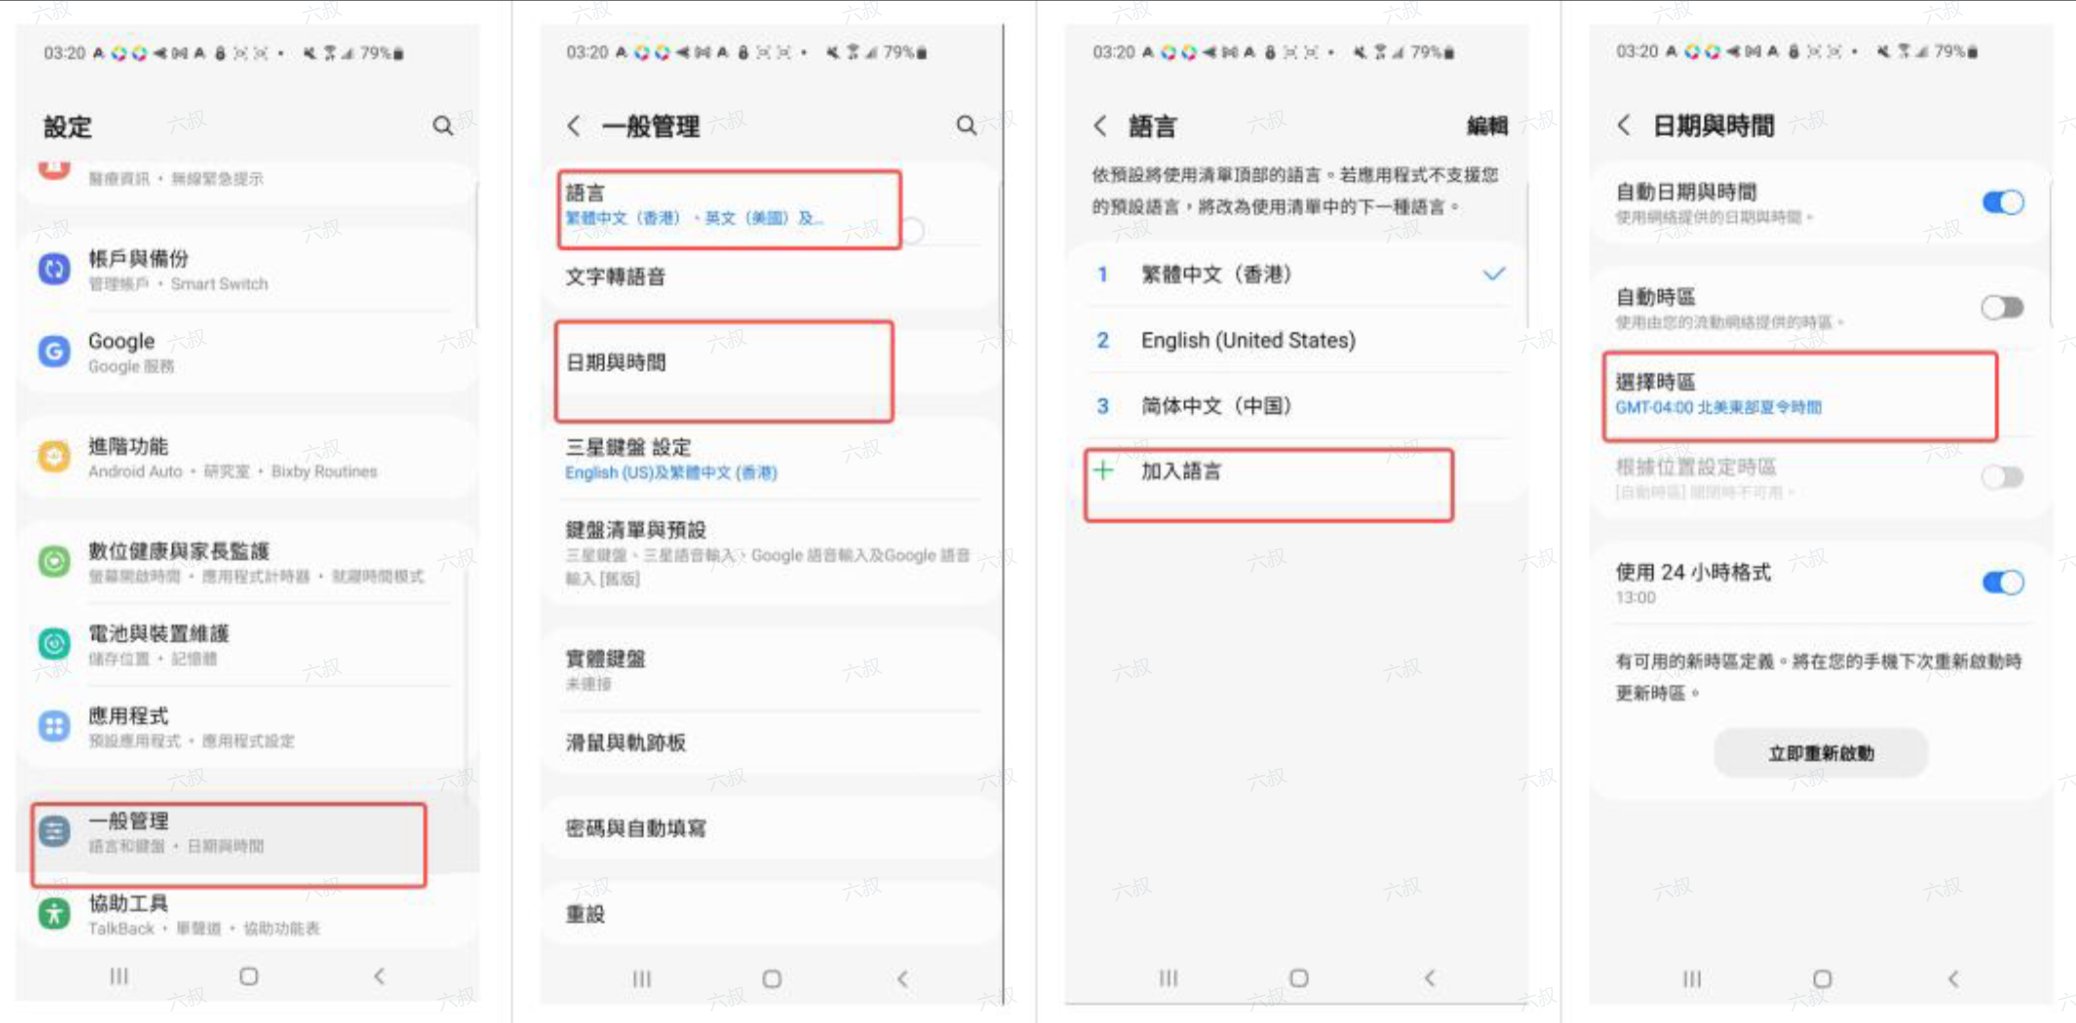
- Open Settings and set your time zone, language, and region to match the proxy IP’s target country or region. Menu names vary by Android device. Choose the target country’s language and avoid using Simplified Chinese.
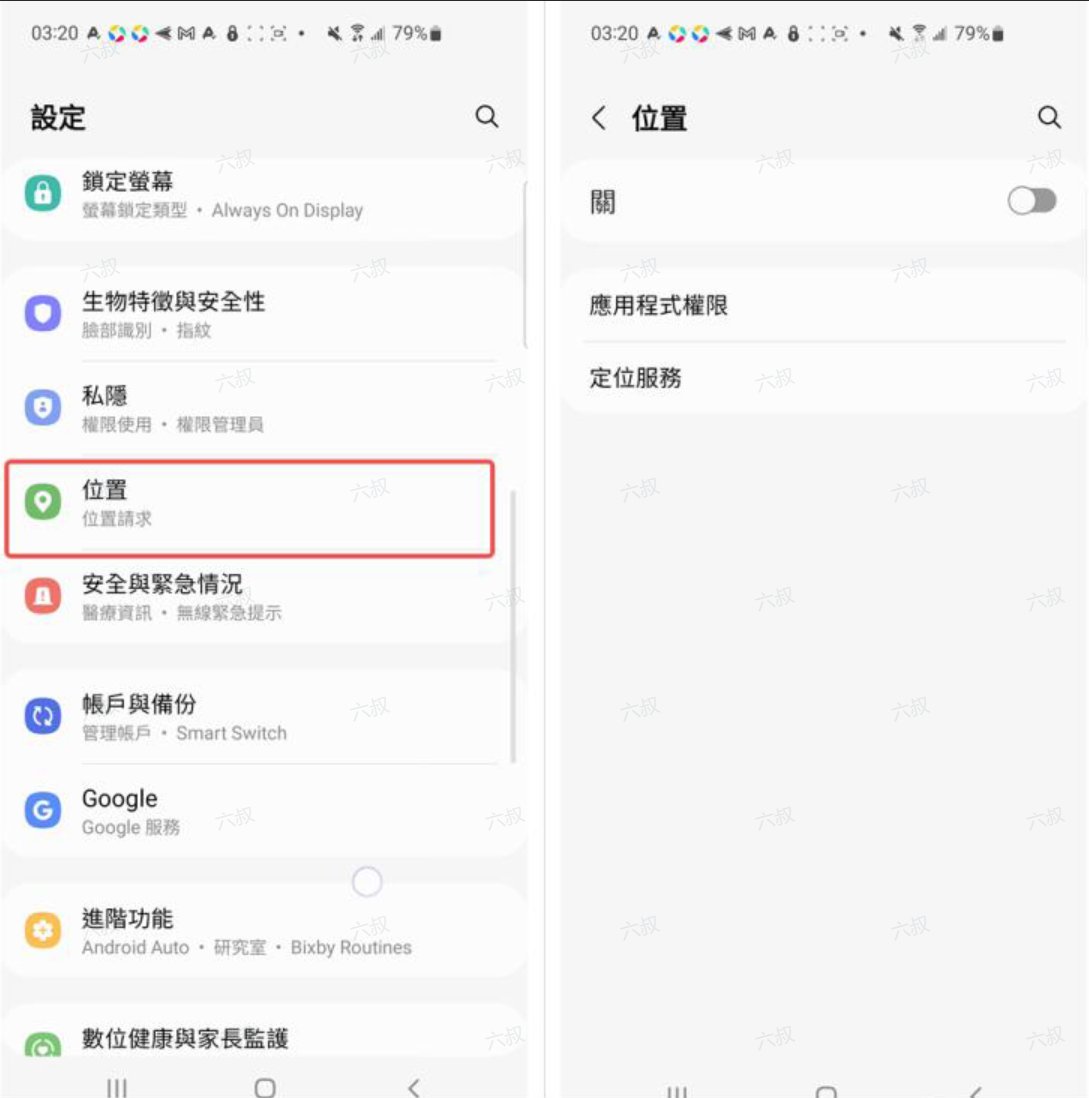
- Find Location in Settings and turn it off.
Before you connect
- Install v2rayNG on your Android phone and prepare a working overseas network node for your first network hop.
- Get the SOCKS5 credentials for your static residential Native proxy from the MiyaIP dashboard: host, port, username, and password.
Configuration steps
1
Import and edit your overseas node
Import your existing overseas network nodes into v2rayNG. Select a working node and tap its edit button.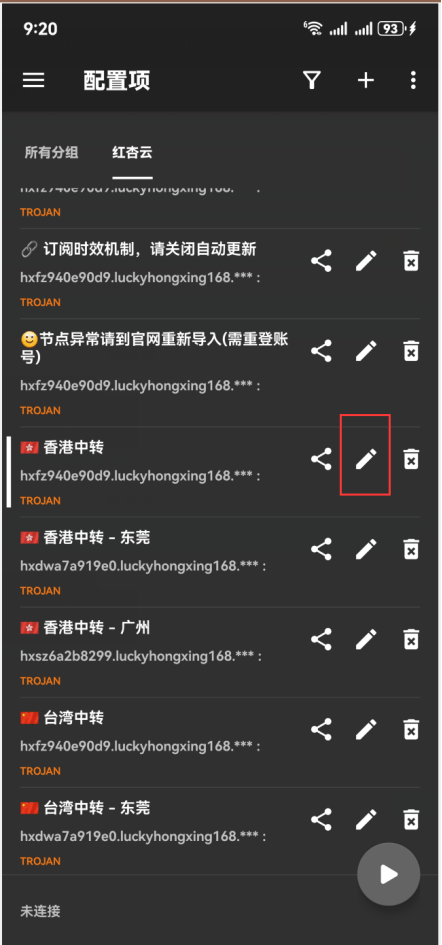
2
Give the node a unique name
Change the overseas node’s name so that no other node has the same name. Tap ✓ in the upper-right corner to save and remember the name.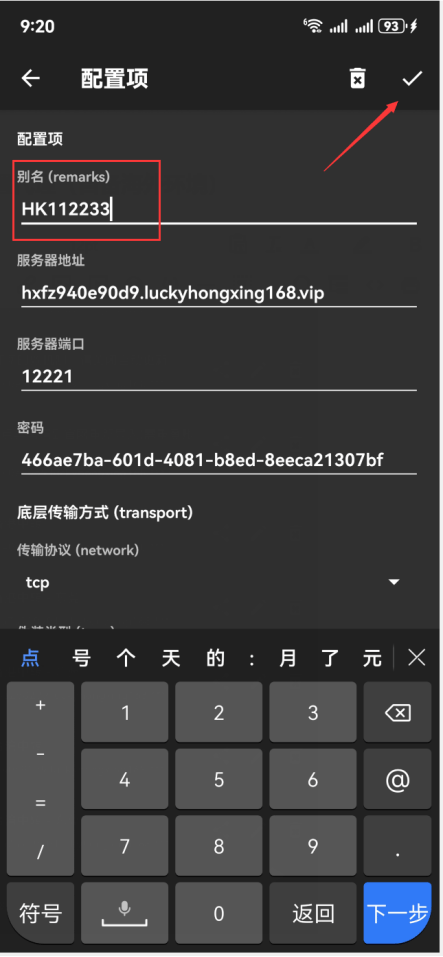
3
Open Subscription group settings
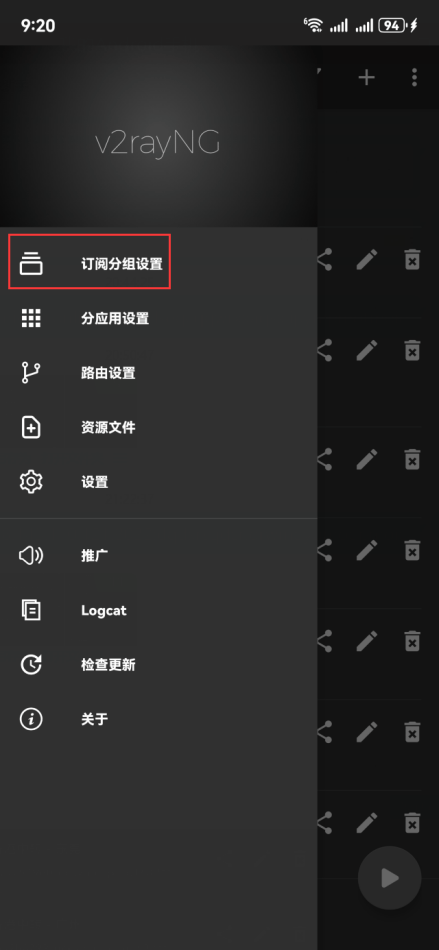
Tap the three-line menu button in the upper-left corner, then select Subscription group settings.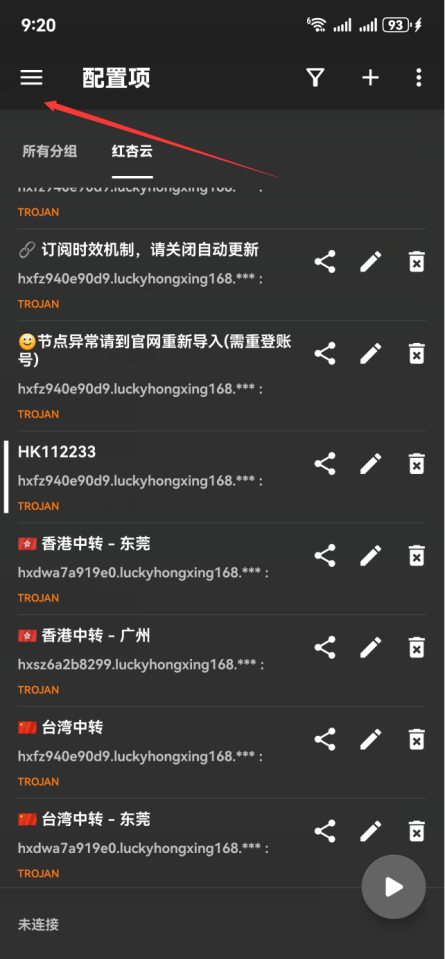
4
Create a group with a Pre-proxy
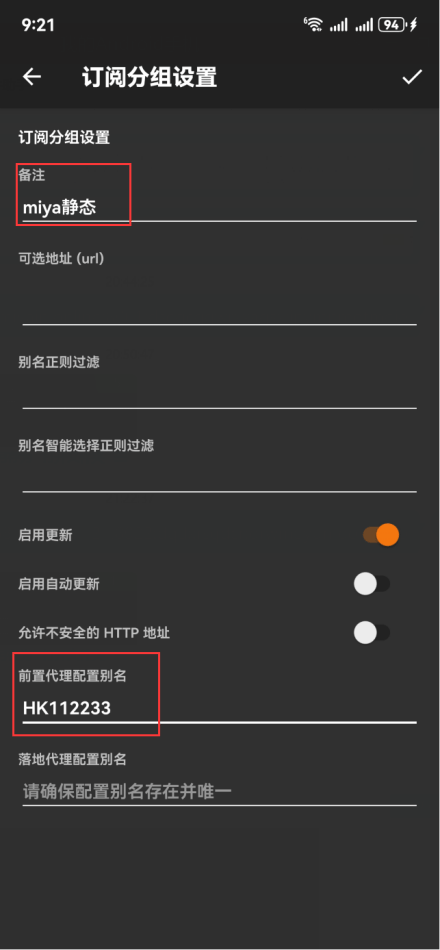
Tap the plus button in the upper-right corner to add a group. Enter a Remark and fill Pre-proxy with the overseas node name you just set. Tap ✓ to save.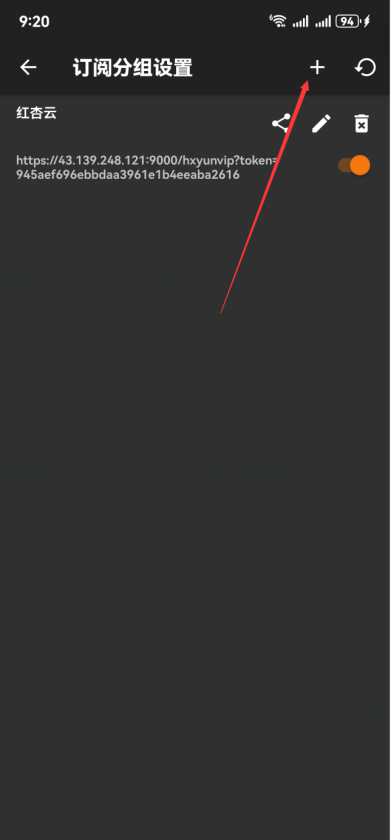
5
Add a SOCKS5 static IP node
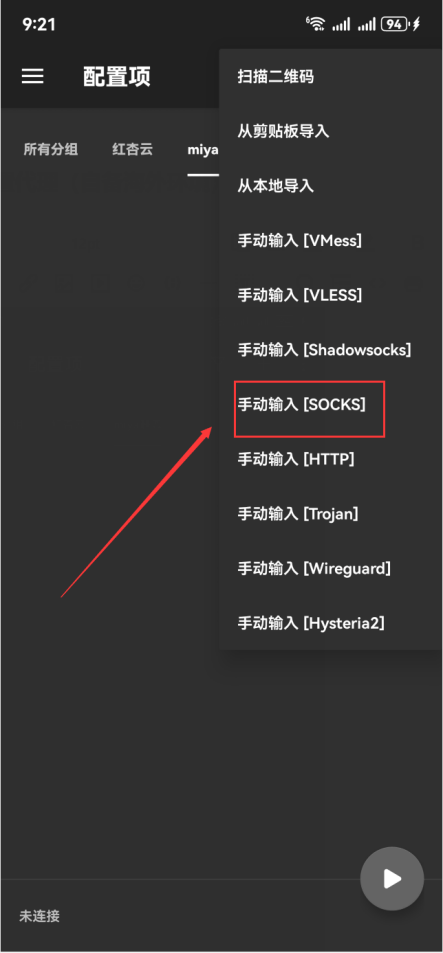
Return to the node list and select the group you just created. Tap the plus button in the upper-right corner, select Manual input, and choose SOCKS5 to add the static IP node.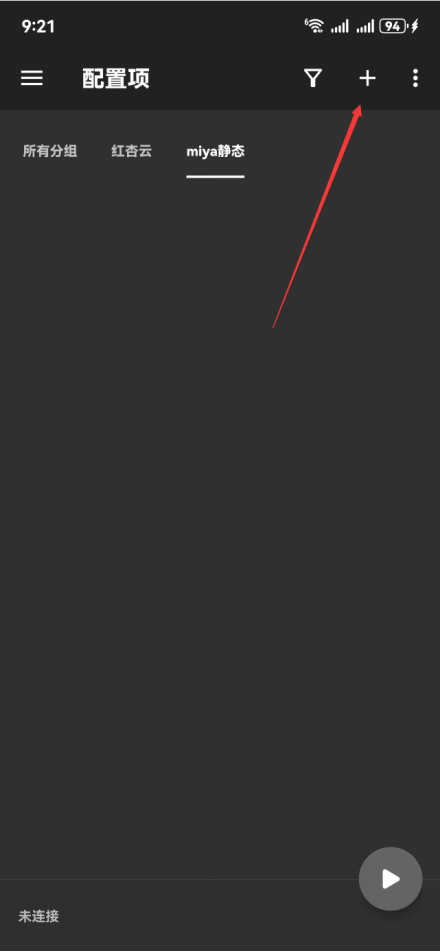
6
Enter your MiyaIP proxy credentials
Enter a Remark for the static IP node. Fill the Server, Port, Username, and Password fields with your MiyaIP native proxy host, port, username, and password, then tap ✓ in the upper-right corner to save.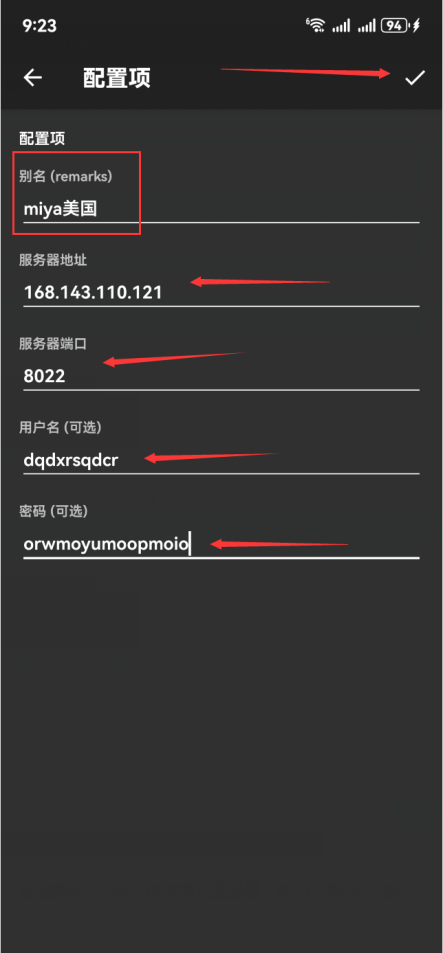
7
Connect and test latency
Select the MiyaIP static IP node you configured and tap the start button at the bottom. Tap the blank area on the main screen to run a latency test.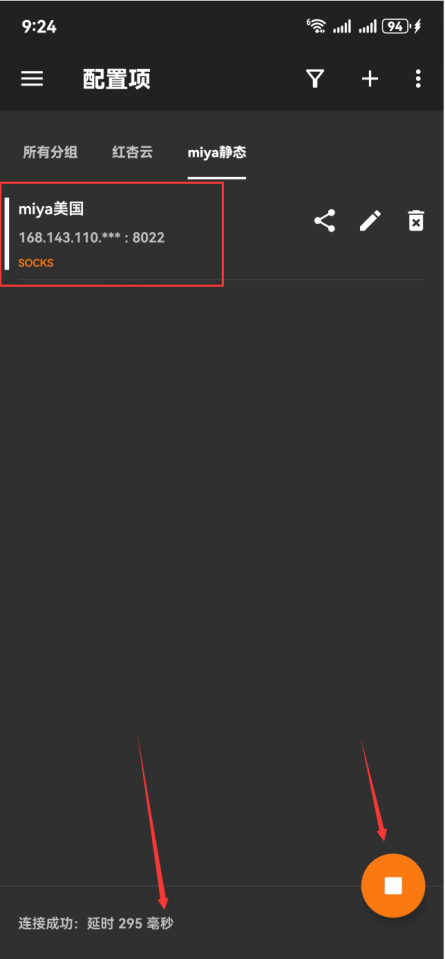
8
Verify your exit IP
After the latency test responds, open whoer.net in your browser. Confirm that the displayed IP address matches the MiyaIP static residential IP you purchased and that the country or region is correct.