> ## Documentation Index
> Fetch the complete documentation index at: https://help.miyaip.com/llms.txt
> Use this file to discover all available pages before exploring further.
# Configure a native proxy on iPhone with Shadowrocket
> Connect to a MiyaIP static residential native proxy with your existing overseas network using Shadowrocket's Proxy through setting.
Use this guide if you already have an overseas network and want to connect to a MiyaIP static residential **Native proxy** on iPhone.
## Prepare your device
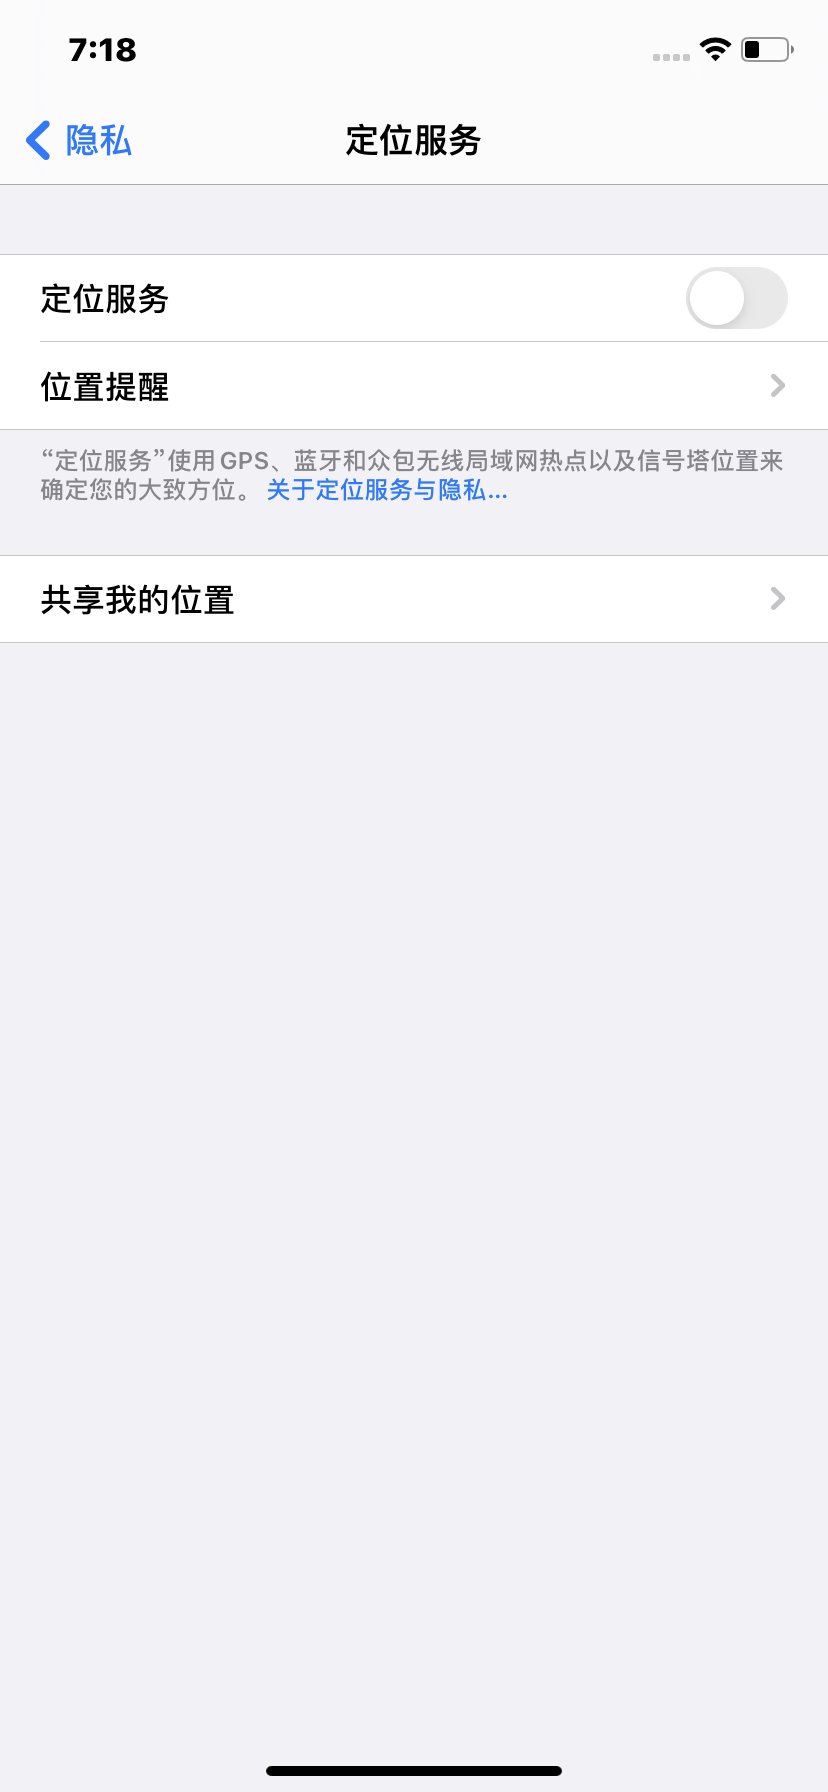
1. Open **Settings → Privacy & Security → Location Services** and turn **Location Services** off.
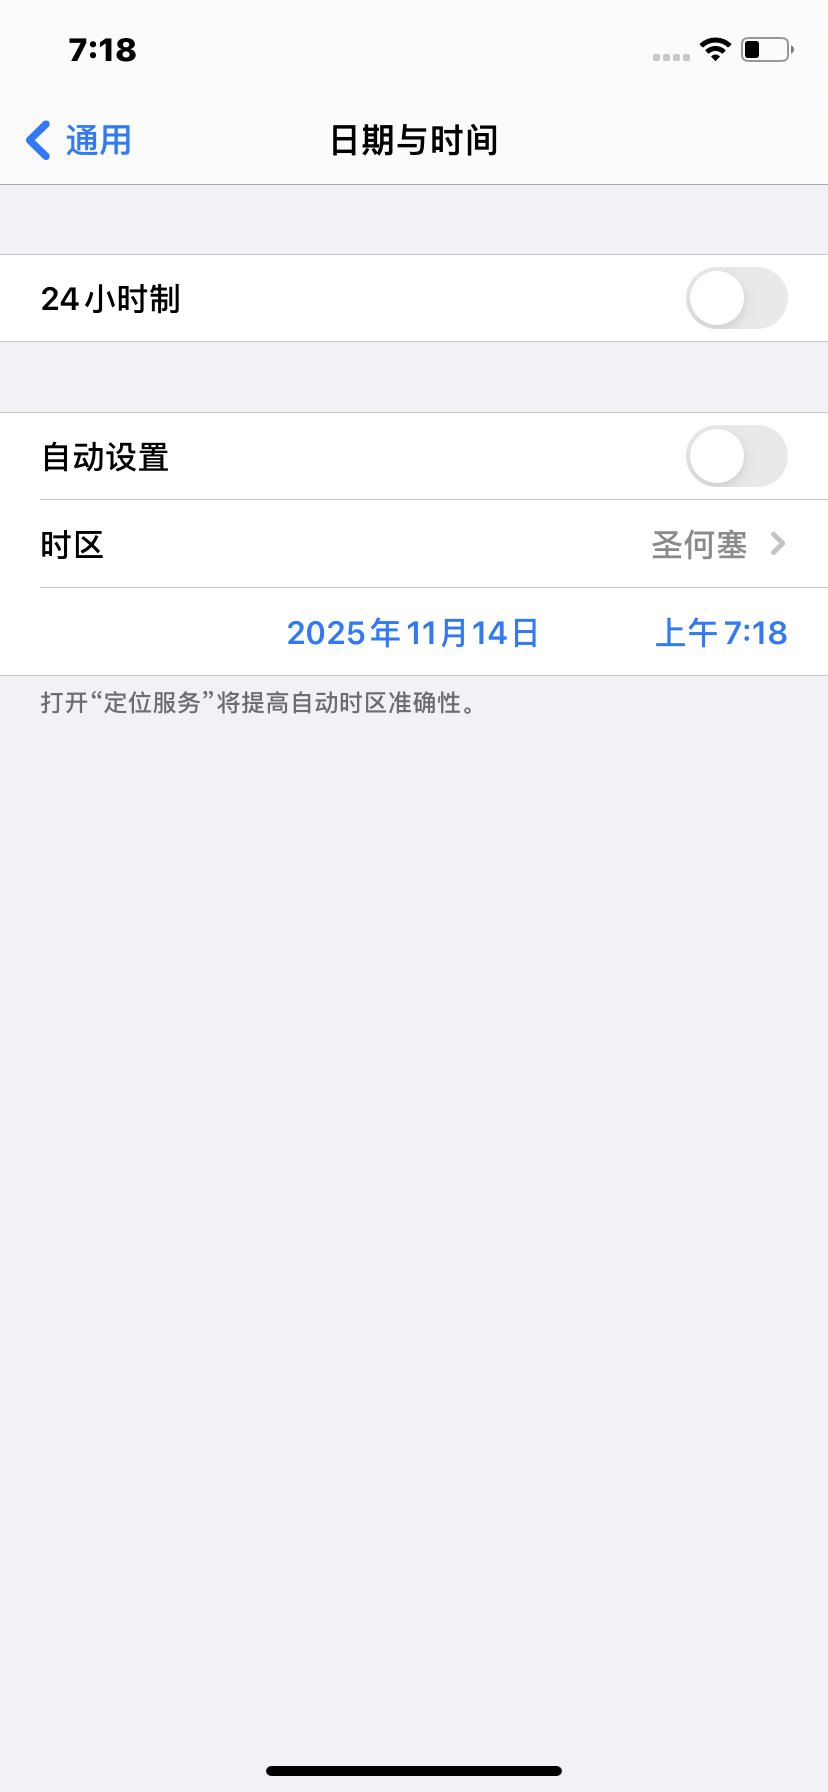
 2. Open **Settings → General**. Adjust the time zone under **Date & Time**, and the **Language & Region** settings, to match the proxy IP's target country or region. Choose the target country's language and avoid using Simplified Chinese.
 See [Device preparation](/device-preparation) for more details.
## Before you connect
* Install **Shadowrocket** on your iPhone and prepare a working overseas network node for your first network hop.
* Get the SOCKS5 node and QR code for your static residential **Native proxy** from the MiyaIP dashboard. Make sure you have the proxy host, port, username, and password.
See [Device preparation](/device-preparation) for more details.
## Before you connect
* Install **Shadowrocket** on your iPhone and prepare a working overseas network node for your first network hop.
* Get the SOCKS5 node and QR code for your static residential **Native proxy** from the MiyaIP dashboard. Make sure you have the proxy host, port, username, and password.
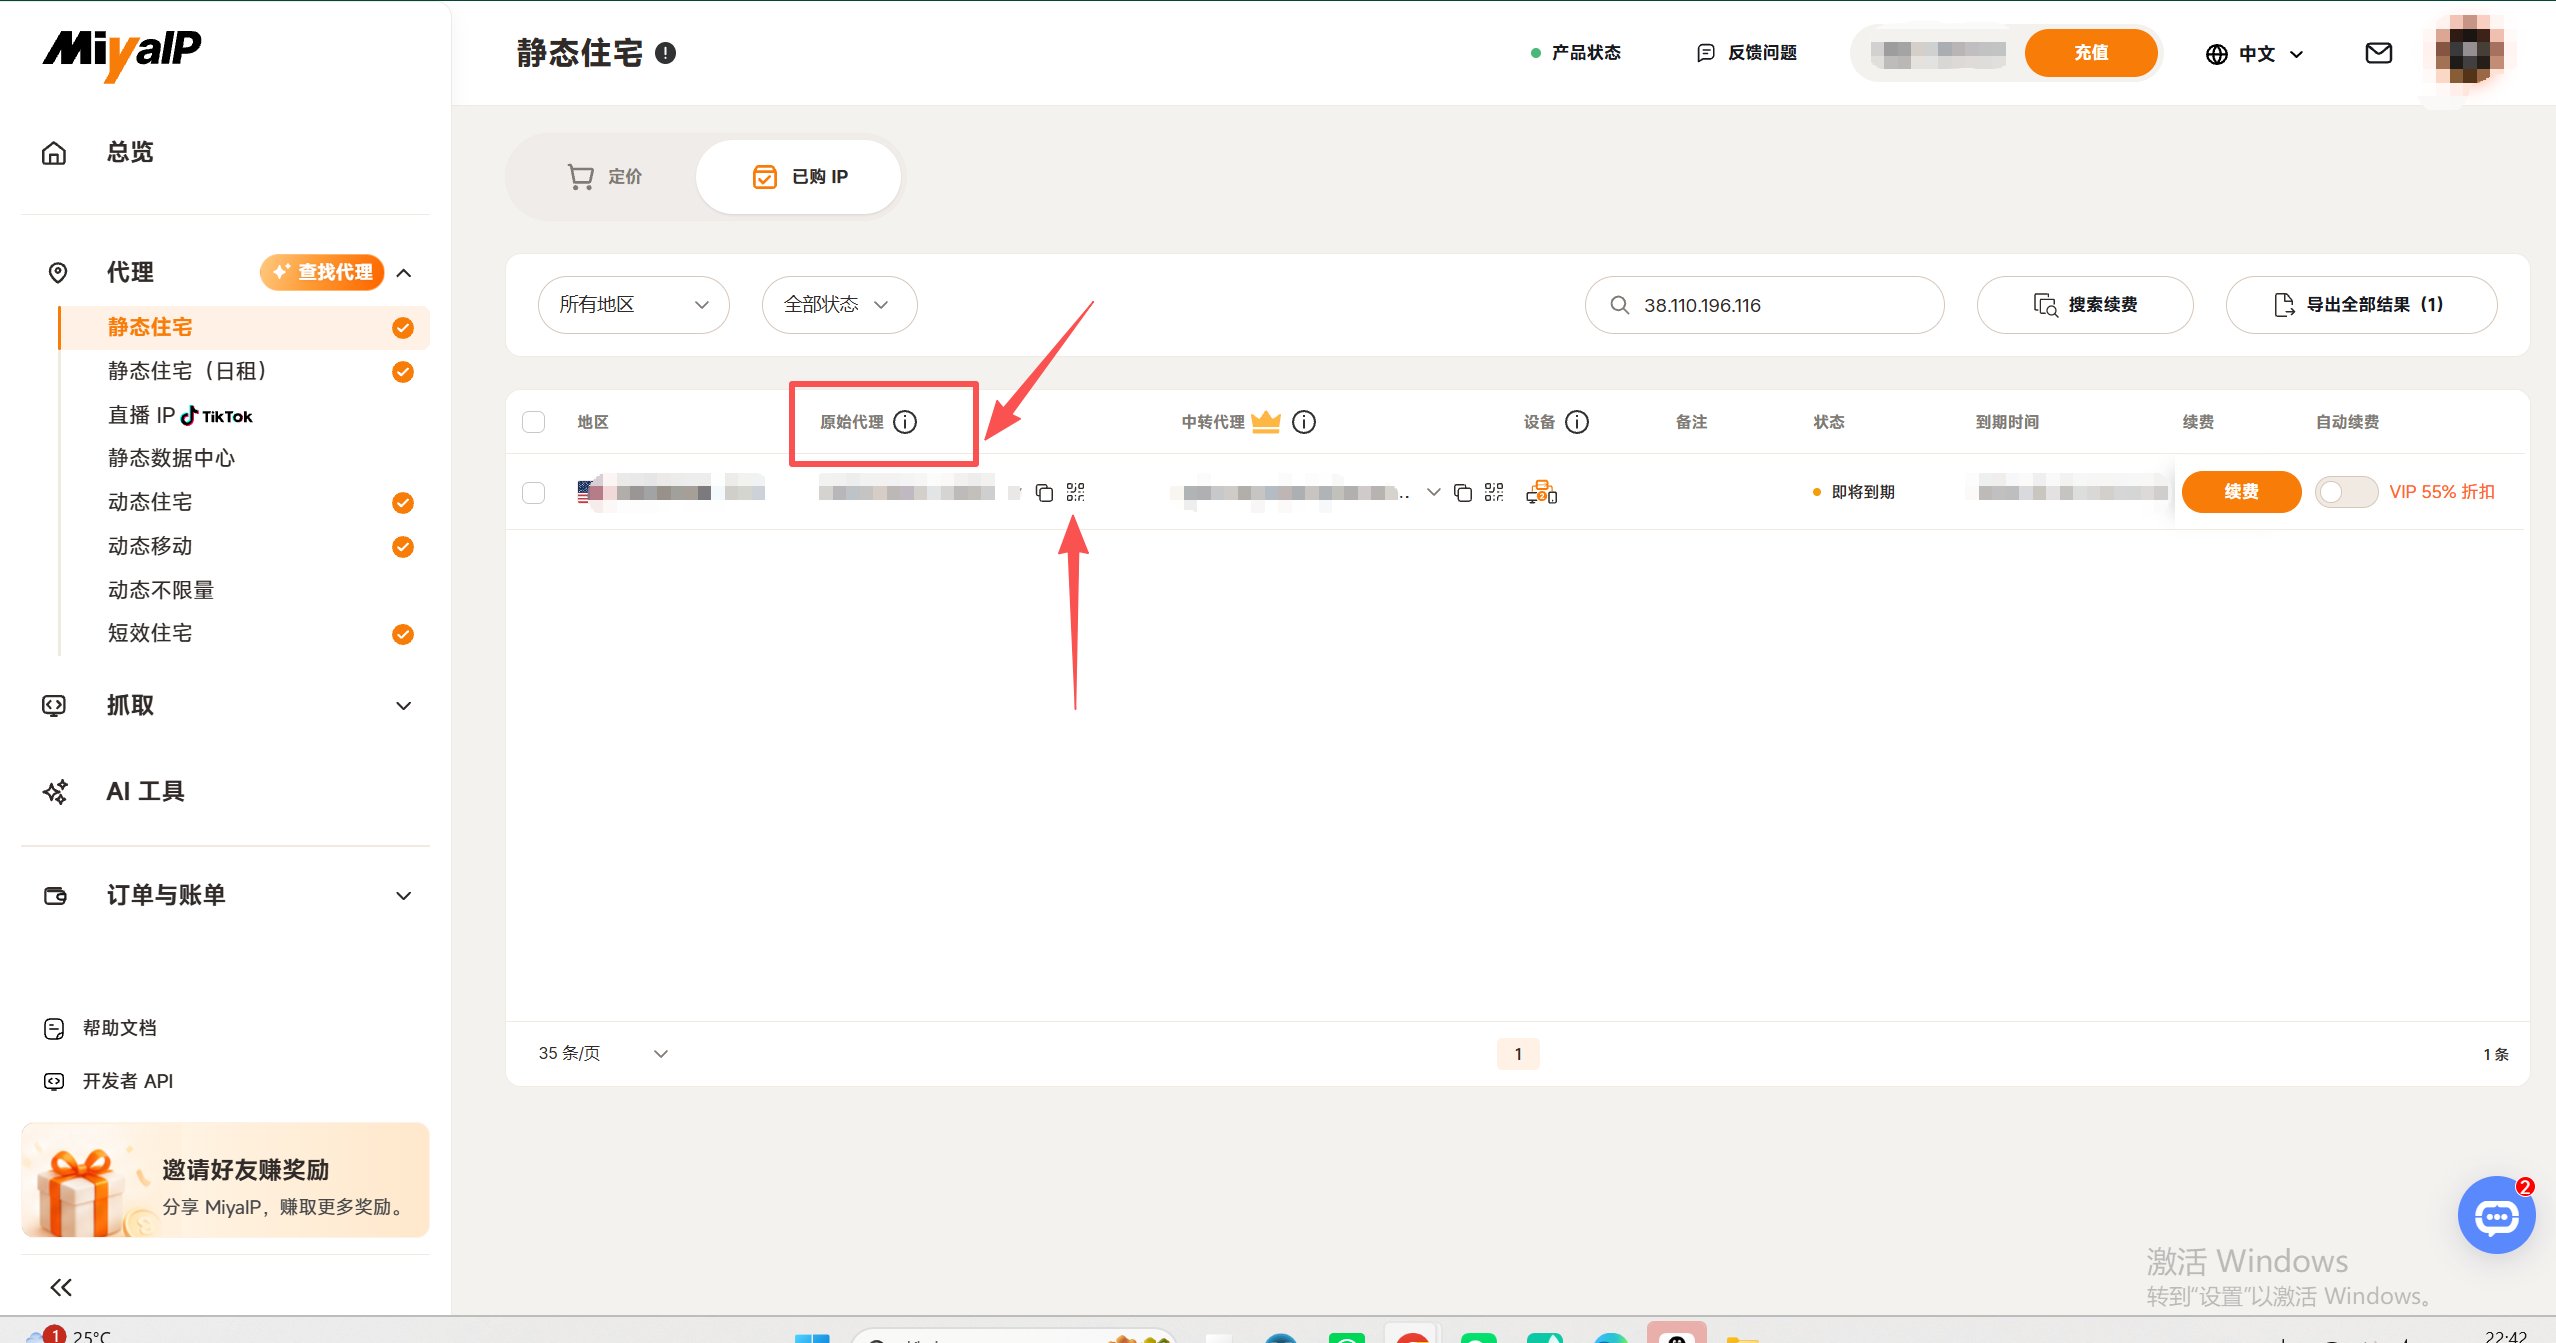 ## Configuration steps
Open Shadowrocket and tap the **scan button** in the upper-left corner. Scan the native proxy QR code in the MiyaIP dashboard to import your static IP node.
## Configuration steps
Open Shadowrocket and tap the **scan button** in the upper-left corner. Scan the native proxy QR code in the MiyaIP dashboard to import your static IP node.
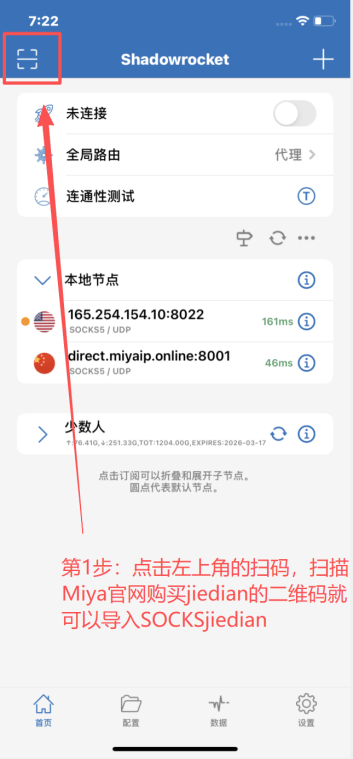 Tap the **exclamation mark button** beside the static IP node you just imported.
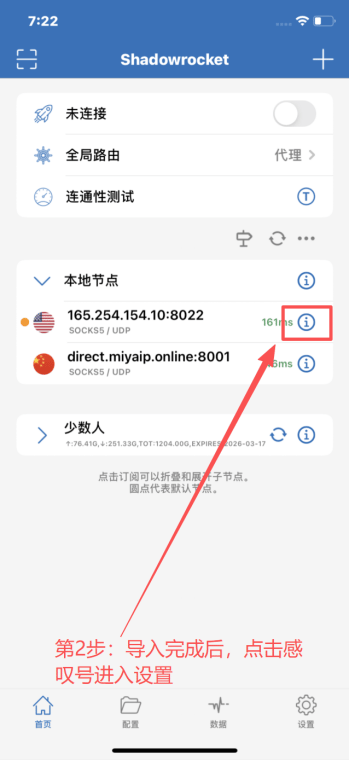 Tap **Proxy through** in the node settings.
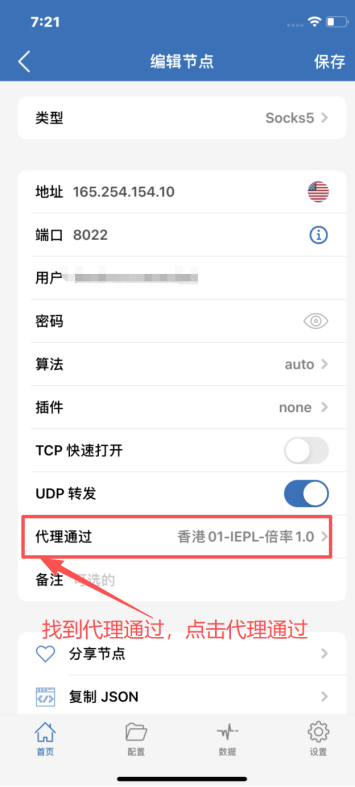 In **Proxy through**, select the overseas network node you prepared.
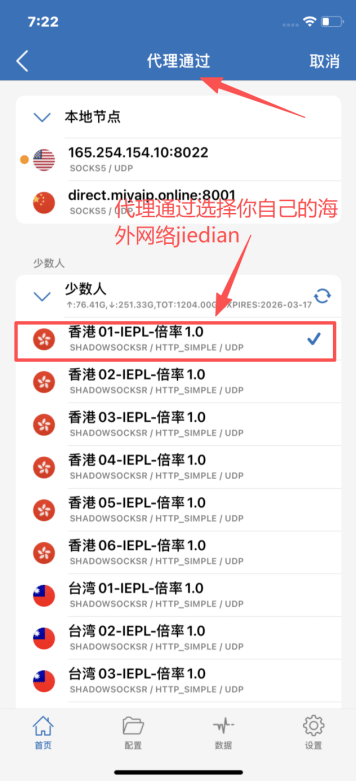 Confirm that the protocol is **SOCKS5**. Check your MiyaIP native proxy **host, port, username, and password**. Confirm that **Proxy through** uses the correct overseas node, then tap **Save**.
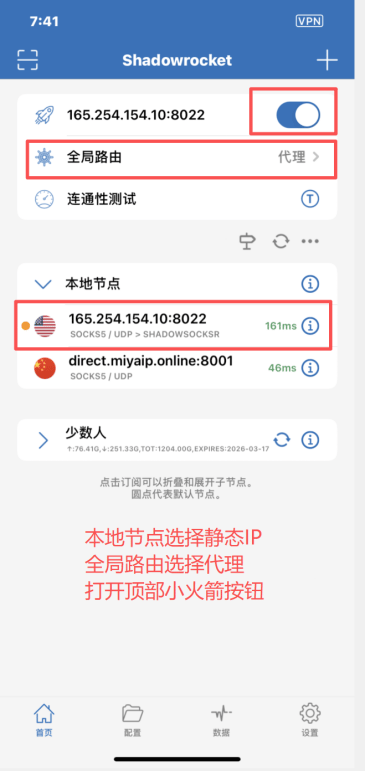
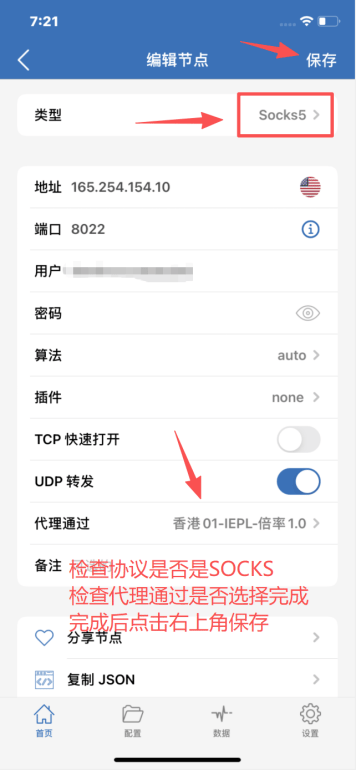 Return to the Shadowrocket home screen and select your **MiyaIP static IP node**. Set **Global routing** to **Proxy**, then turn on the **connection switch** at the top.
 Open [whoer.net](https://whoer.net) in your browser. Confirm that the displayed **IP address** matches the MiyaIP static residential IP you purchased and that the **country or region** is correct.