> ## Documentation Index
> Fetch the complete documentation index at: https://help.miyaip.com/llms.txt
> Use this file to discover all available pages before exploring further.
# Configure a native proxy on Android with v2rayNG
> Set an existing overseas node as a Pre-proxy in v2rayNG and connect to a MiyaIP static residential SOCKS5 native proxy.
Use this guide if you already have an overseas network node and want to connect to a MiyaIP static residential **Native proxy** on Android.
Download and install v2rayNG from the [official v2rayNG releases page](https://github.com/2dust/v2rayNG/releases). You need a network connection that can access GitHub.
## Prepare your device
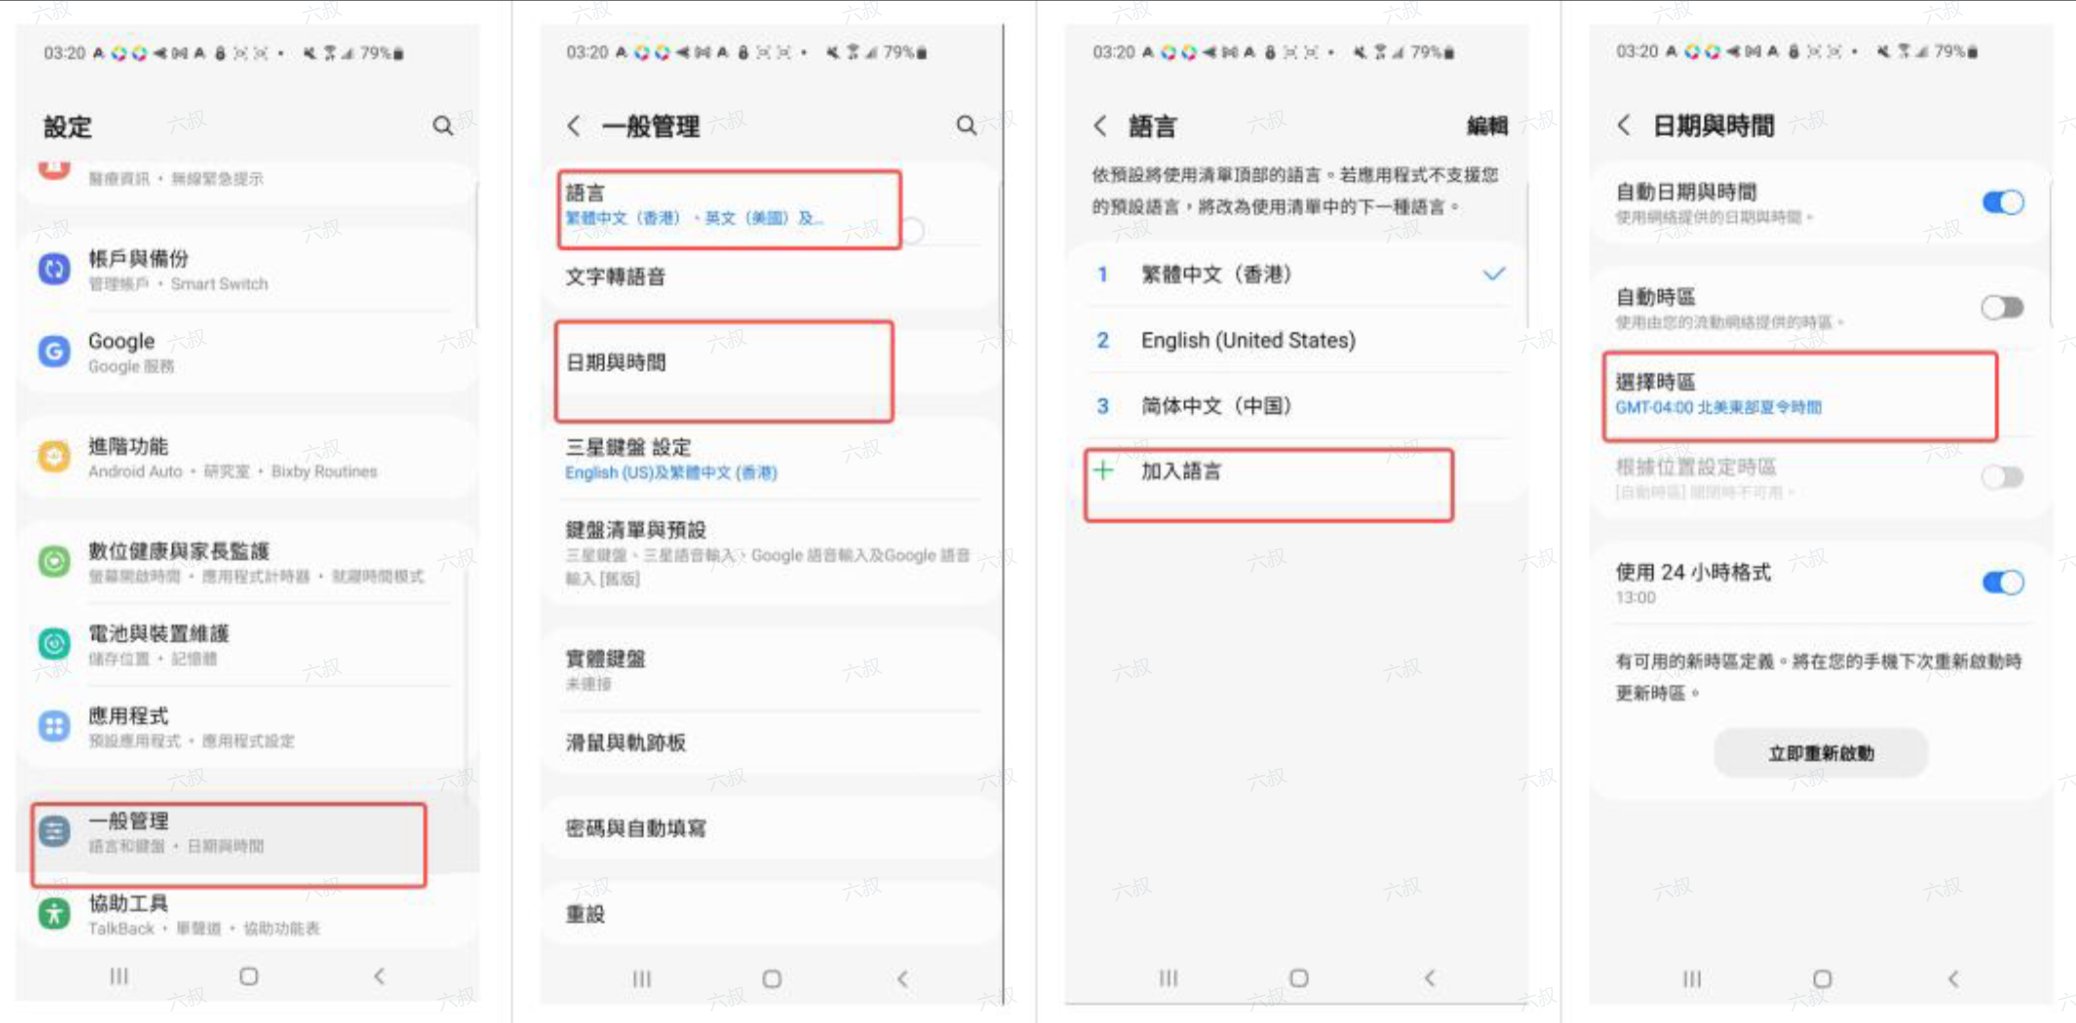
1. Open **Settings** and set your **time zone**, **language**, and **region** to match the proxy IP's target country or region. Menu names vary by Android device. Choose the target country's language and avoid using Simplified Chinese.
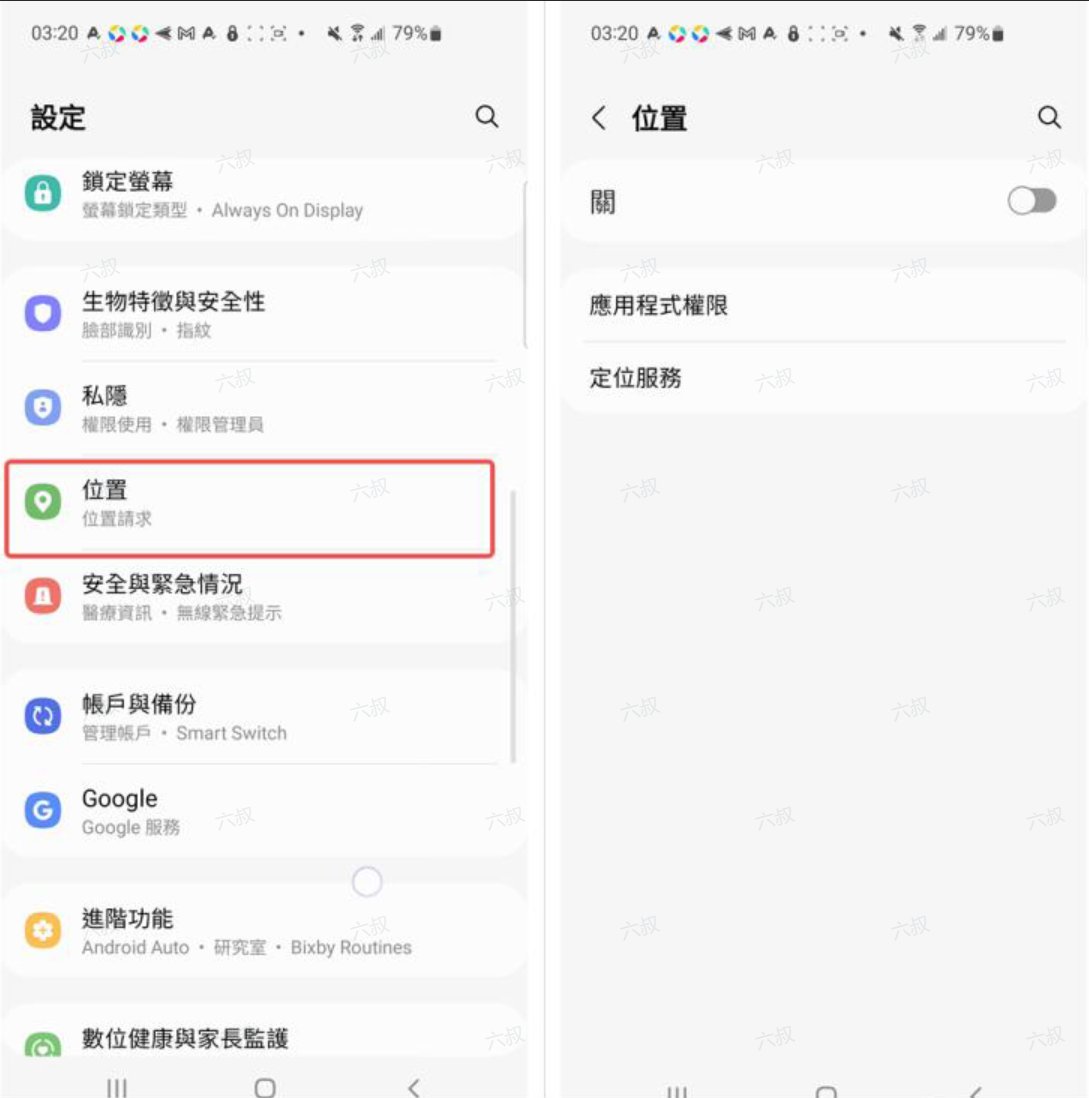
 2. Find **Location** in **Settings** and turn it off.
 See [Device preparation](/device-preparation) for more details.
## Before you connect
* Install **v2rayNG** on your Android phone and prepare a working overseas network node for your first network hop.
* Get the SOCKS5 credentials for your static residential **Native proxy** from the MiyaIP dashboard: **host, port, username, and password**.
## Configuration steps
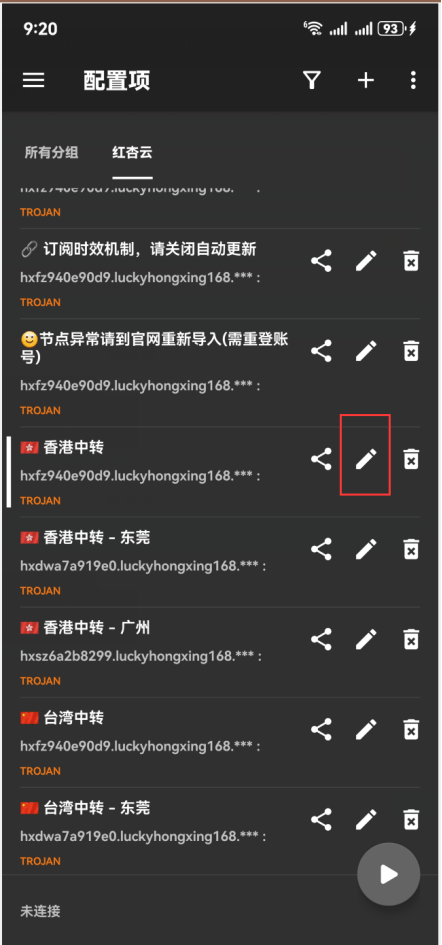
Import your existing overseas network nodes into v2rayNG. Select a working node and tap its **edit button**.
See [Device preparation](/device-preparation) for more details.
## Before you connect
* Install **v2rayNG** on your Android phone and prepare a working overseas network node for your first network hop.
* Get the SOCKS5 credentials for your static residential **Native proxy** from the MiyaIP dashboard: **host, port, username, and password**.
## Configuration steps
Import your existing overseas network nodes into v2rayNG. Select a working node and tap its **edit button**.
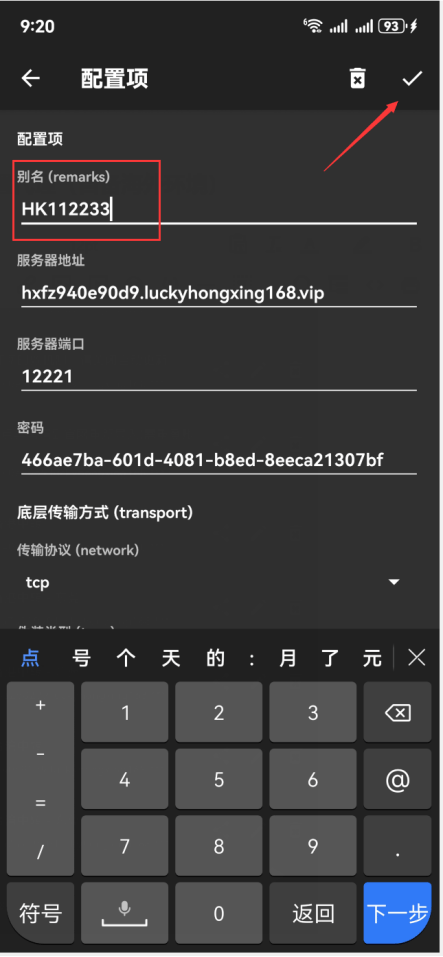
 Change the overseas node's **name** so that no other node has the same name. Tap **✓** in the upper-right corner to save and remember the name.
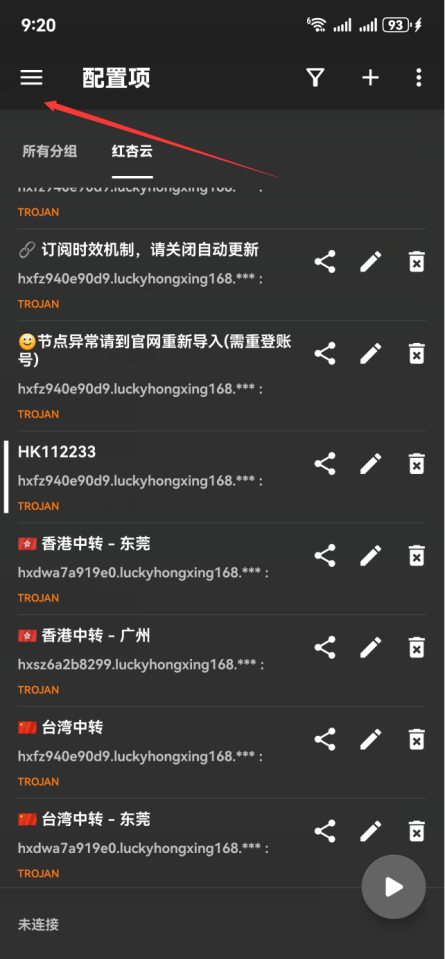
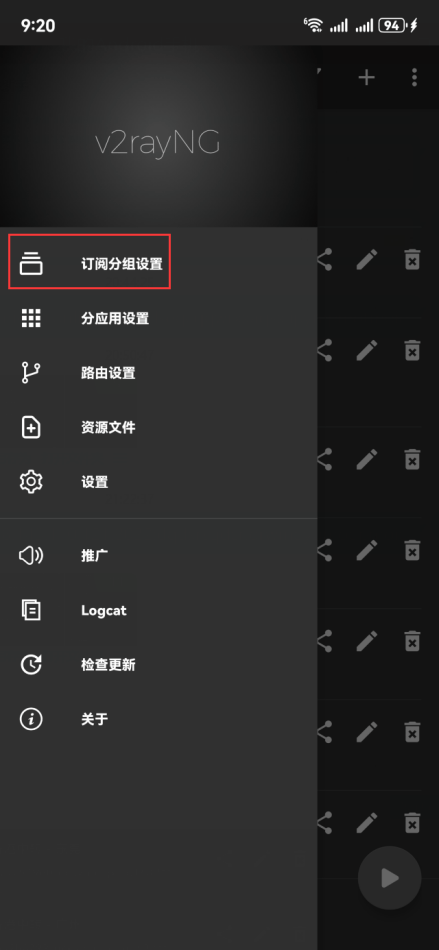
 Tap the **three-line menu button** in the upper-left corner, then select **Subscription group settings**.
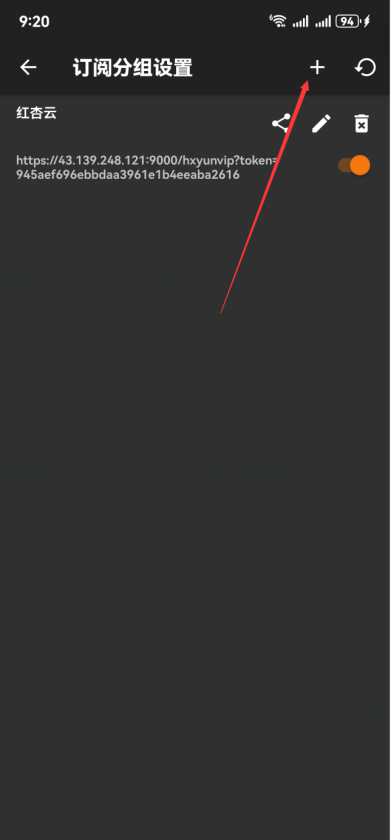
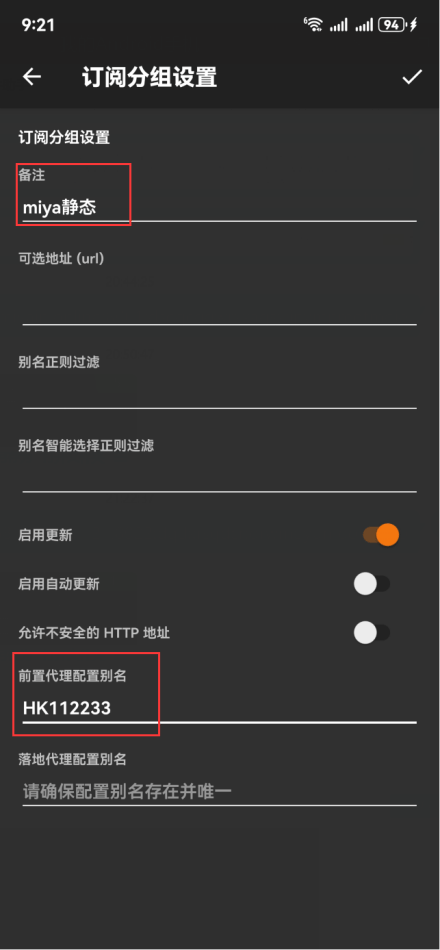
 Tap the **plus button** in the upper-right corner to add a group. Enter a **Remark** and fill **Pre-proxy** with the overseas node name you just set. Tap **✓** to save.
 Return to the node list and select the group you just created. Tap the **plus button** in the upper-right corner, select **Manual input**, and choose **SOCKS5** to add the static IP node.
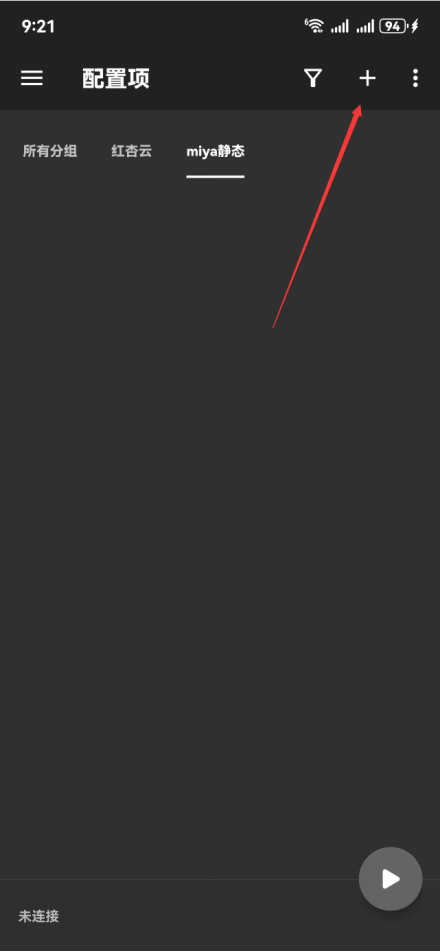
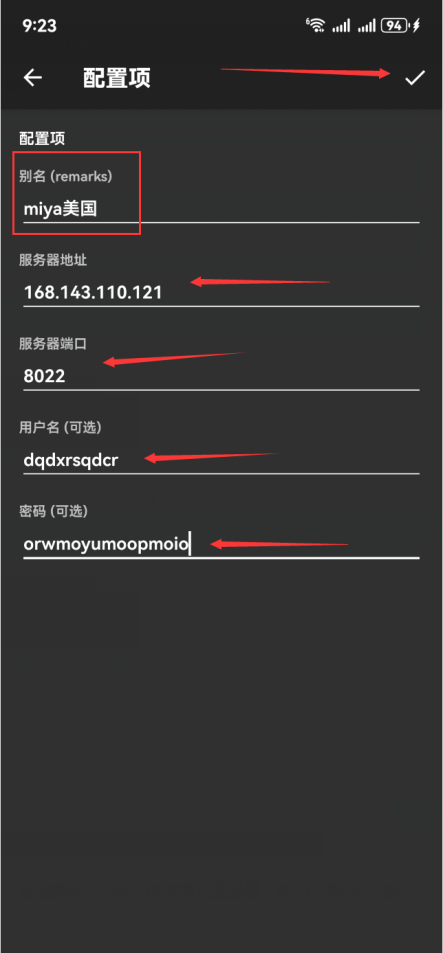
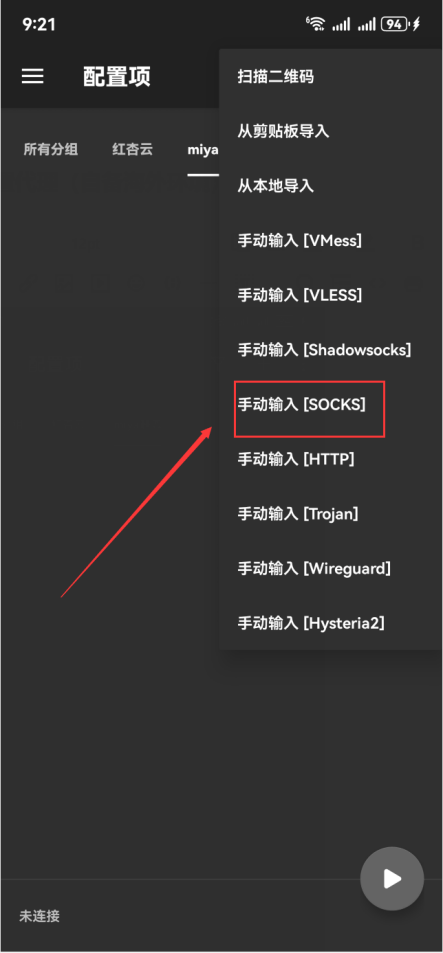 Enter a **Remark** for the static IP node. Fill the **Server, Port, Username, and Password** fields with your MiyaIP native proxy **host, port, username, and password**, then tap **✓** in the upper-right corner to save.
 Select the **MiyaIP static IP node** you configured and tap the **start button** at the bottom. Tap the **blank area** on the main screen to run a latency test.
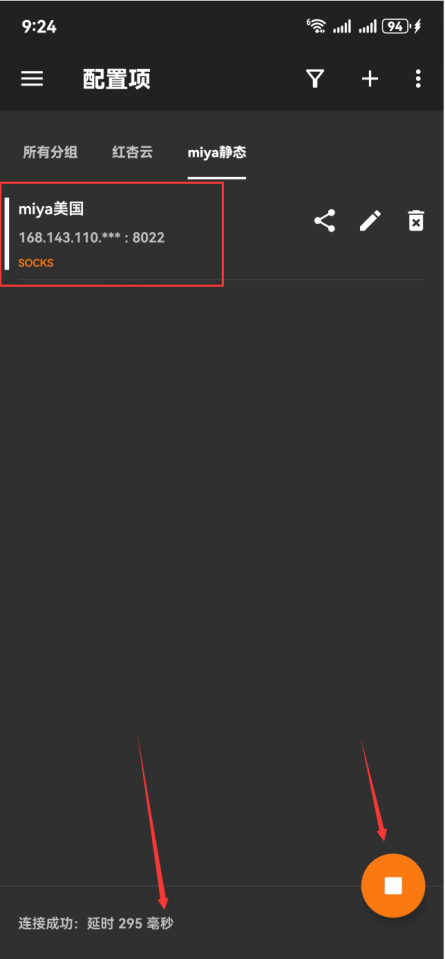 After the latency test responds, open [whoer.net](https://whoer.net) in your browser. Confirm that the displayed **IP address** matches the MiyaIP static residential IP you purchased and that the **country or region** is correct.